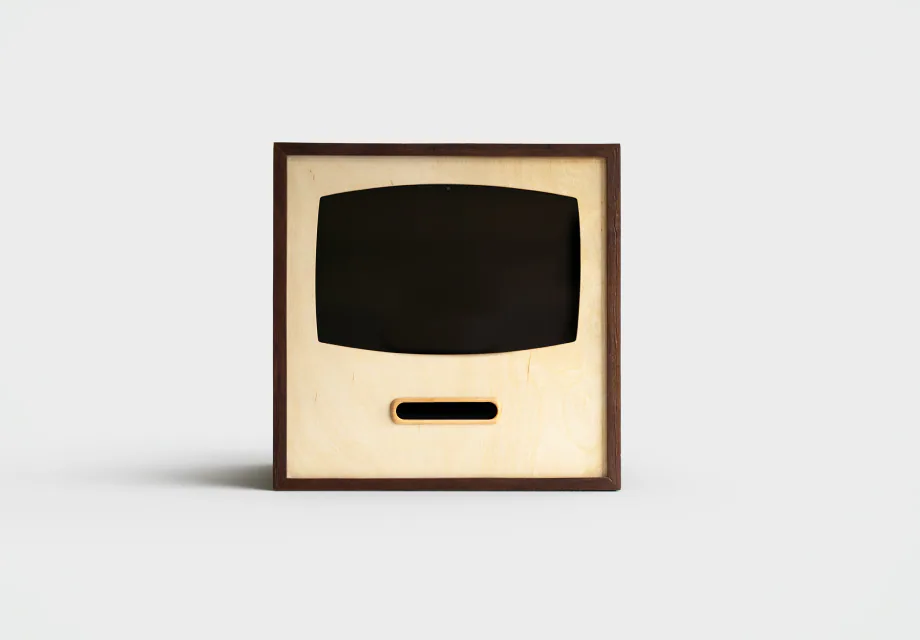
One of the first questions potential buyers and partners ask about the Receipt Camera® is: “Can it carry our brand?” The answer is yes, and the options go further than most people expect.
The Receipt Camera® is a self-service photo booth that prints black-and-white thermal photos in receipt form. Out of the box, it already draws attention. With your brand on it, every print becomes a branded keepsake that travels with the guest long after the moment.
Five things you can customize
These are the five elements you can configure for your deployment:
- Brand logo — printed prominently on the output so every guest walks away with your mark on their photo
- Bottom print text — a tagline, short phrase, web address, or event name that appears below the photo
- Screen UI — the on-screen interface your visitors see and tap as they shoot their photo
- Frame — a decorative border that wraps the photo area on the printed output
- Top and bottom images — graphic elements positioned above and below the photo on the print
Each of these elements can be set independently. You might use just a logo and a bottom tagline for a permanent cafe installation, or configure all five for a full brand campaign pop-up.
What the prints actually look like
Easier to show than to describe. These came out of real venues and events.
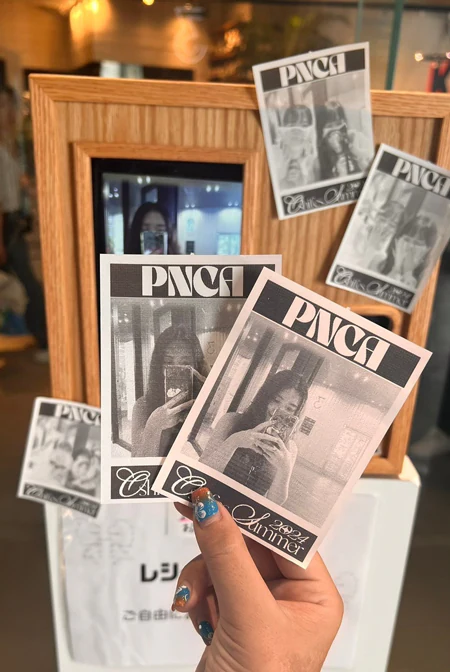
A brand wordmark on top, a campaign line and the year underneath. It makes the point clearly: everything that is not the photo is yours.
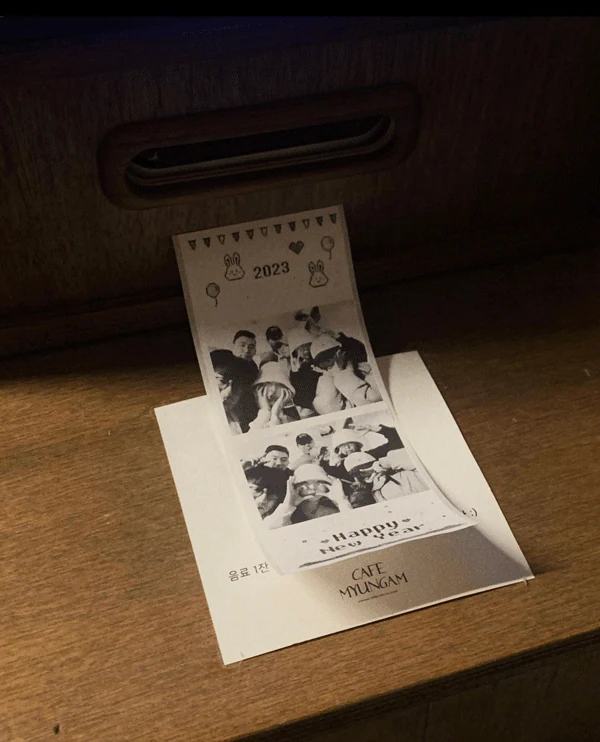
Several frames stacked vertically, a seasonal graphic on top, a greeting underneath. Pair the logo with a drink coupon and the print doubles as a reason to come back.
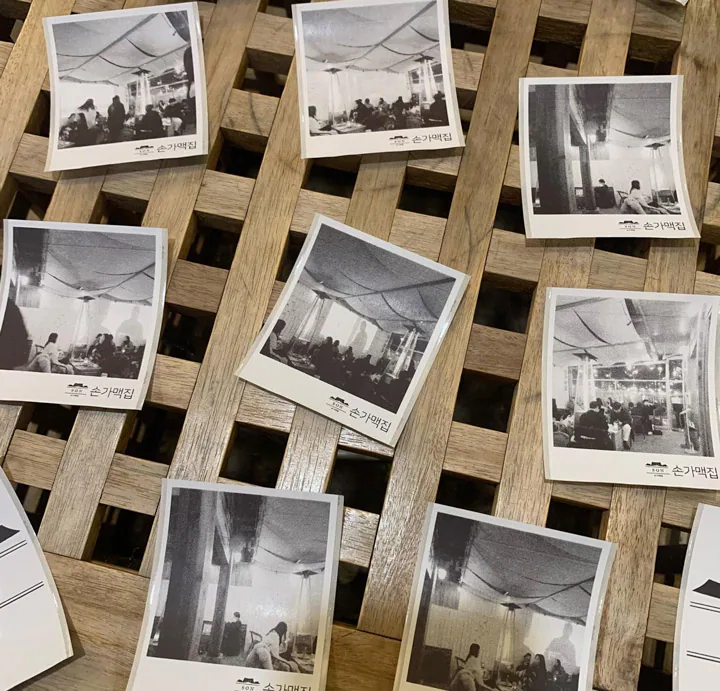
Label stock with nothing but the venue logo along the bottom. For a permanent installation, this restraint tends to age best.
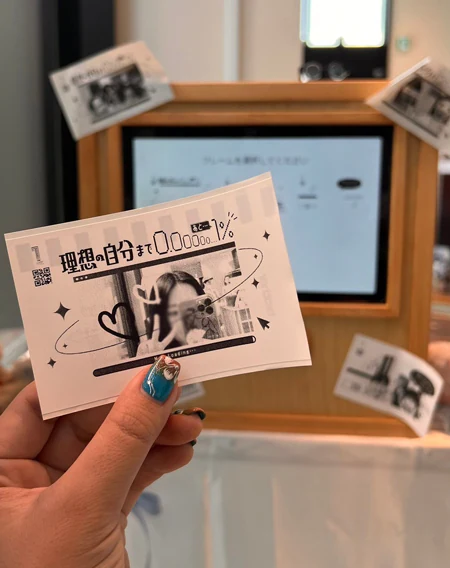
Here the layout itself was built around the campaign. Add copy and a QR code and a single print starts doing the job of a flyer.
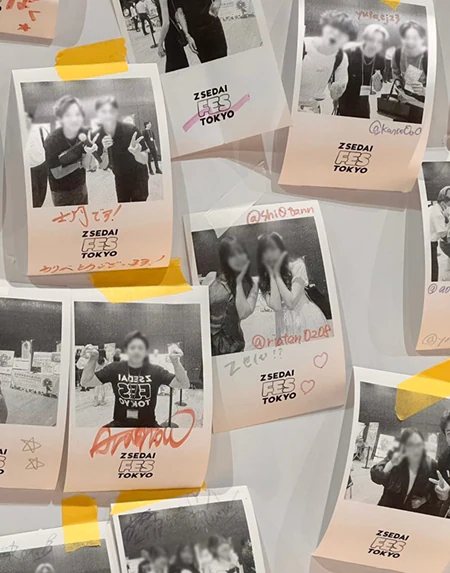
Lock the event logo to the bottom edge and, once guests add handwriting and stick them up, the wall becomes an archive of the event.
Why branded output matters more than you might think
A thermal black-and-white photo print is already unusual. Most people have never received one as a keepsake. When your logo and message are on it, the print becomes a small but tangible brand artifact.
Unlike social media content, a physical print does not get scrolled past. It gets tucked into a wallet, stuck on a laptop lid, pinned to a mood board. The guests who keep it are the people most engaged with your brand at that moment.
At a pop-up store, a brand activation, or a temporary event, this kind of branded print amplifies the experience beyond the event itself. People share it, photograph it, and talk about where it came from. At a permanent venue like a cafe or restaurant, the repetition of a consistent logo and tagline over weeks and months of daily operation builds genuine brand recall.
The Receipt Camera® is already distinctive by its format. Branding it ties that distinctiveness to you.
How the customization process works
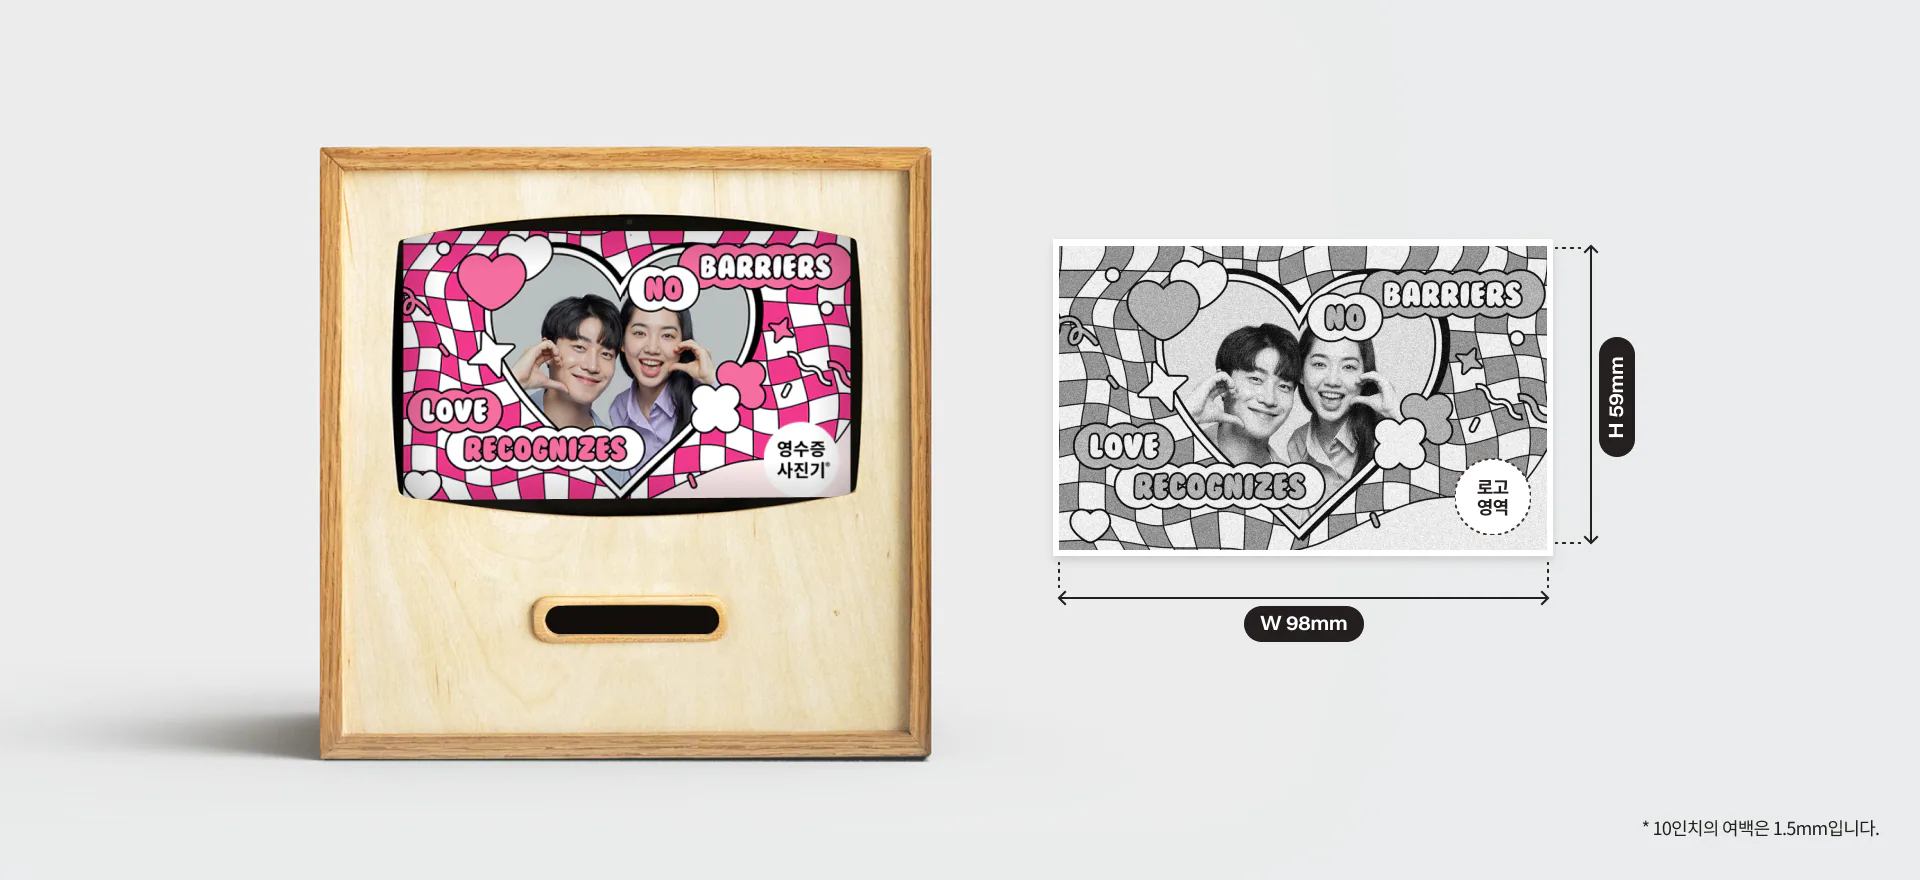
You do not need to arrive with a finished design. When you place a purchase inquiry, share the direction you have in mind:
- A logo file (black-and-white or high-contrast works best for thermal output)
- Your preferred bottom text, if any (tagline, URL, event name)
- Any frame or image style preferences
Brief Company reviews your brief and handles the configuration. The setup is applied before the unit ships, so it arrives ready to use.
Build it yourself in the web demo first
Sending a direction is enough, but if you would rather see the result before committing, build it yourself in the web demo. It runs in a browser before you order, with nothing to install and no account needed.
Pick a product and the screen adapts to that model’s paper size and available features. The Capture & output tab covers capture mode and ratio, paper, the branding above and below the photo, and the QR code. The UX settings tab covers the capture screen background and the intro screen. If you are starting cold, Apply sample settings drops in a finished example you can edit from.
The part that matters most is the output preview. It applies the same dithering the thermal printer uses, so you find out whether your logo turns to mush or your text is too thin before anything is produced. With an ordinary printer you can also print a sample onto A4 at true receipt width and judge it in your hand.
Once it looks right, press Generate setup code and send that code with your purchase inquiry. We ship the unit with those settings already applied. The code stays valid for 31 days, and you can reload it to keep working at any point.
Designing for thermal printing: a short primer
Thermal printing is black-and-white by nature, and contrast is everything. A few principles apply to anything you plan to put on the output:
- Logos: Bold, clean, text-heavy marks print crisply. Complex illustrative logos with fine gradients or hairlines can lose detail at thermal resolution.
- Bottom text: A clear, simple phrase in larger type reads well. Keep it short and high-contrast.
- Frames: Geometric and clean-line borders hold up well. Fine-detail patterns may print muddy.
- Top and bottom images: Sharp silhouettes and flat-fill graphics translate best. Gradients fade to grey.
Think of the print as a black-and-white photograph with your brand layered on top. What reads clearly in a high-contrast, black-and-white photo tends to print well on thermal paper.
For real-world examples of how businesses have deployed the Receipt Camera® in their spaces, see the use cases page.
Multiple units or regional distribution?
If you are planning a multi-unit deployment with consistent branding across all units, the same framework scales with you. Every unit can carry the same logo, frame, and text so the experience is uniform across all your venues or event stops.
If you are interested in bringing the Receipt Camera® to your local market as a regional partner or distributor, customization becomes part of what you offer your own customers. Partners and distributors work with Brief Company to develop region-appropriate configurations and support their clients’ brand setups over time.
Use the inquiry form below to start the conversation. Let us know your region, your planned scale, and what you have in mind for branding, and Brief Company will follow up with options for your situation.