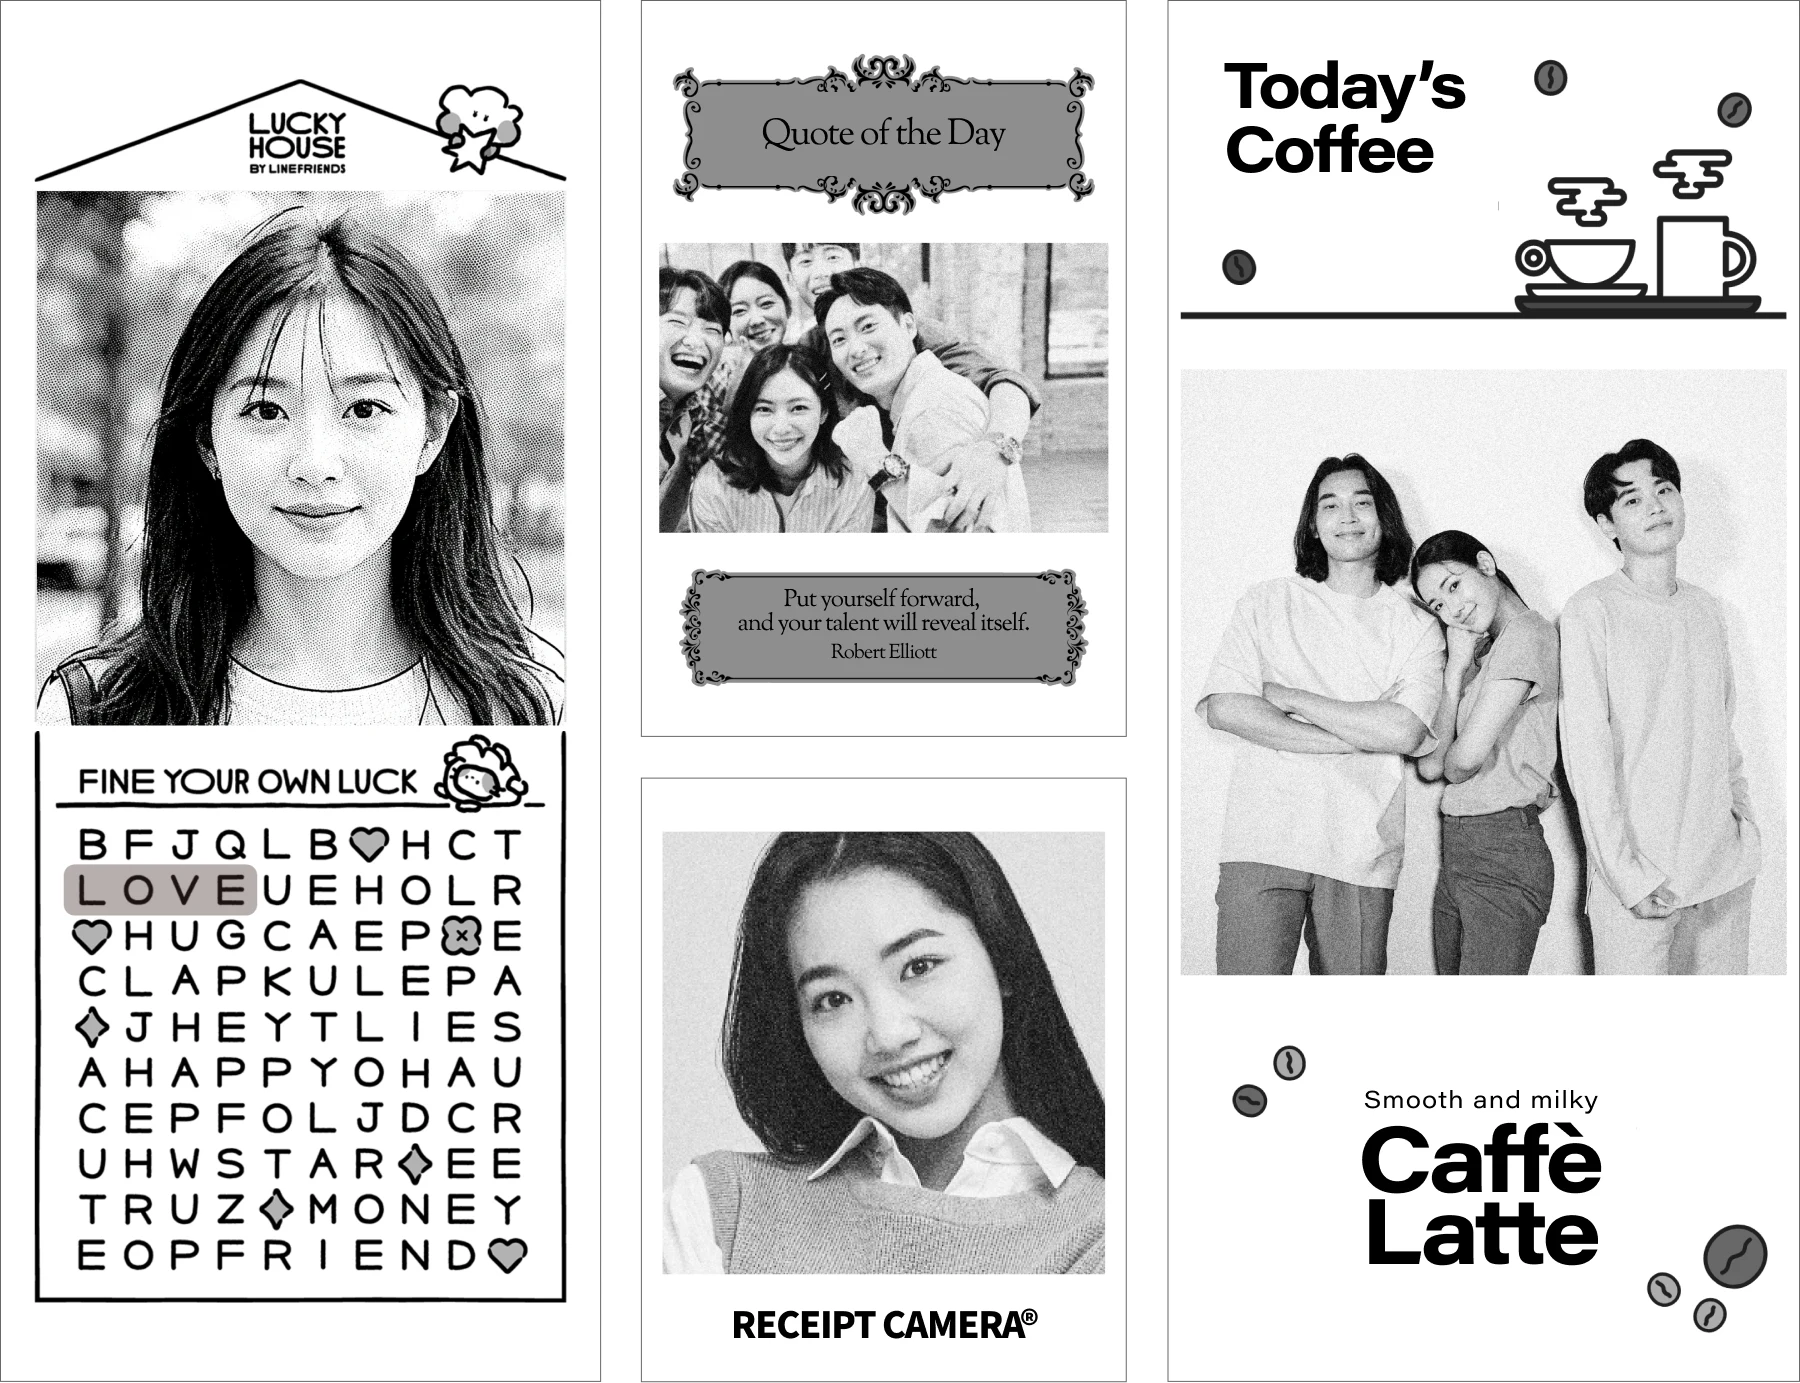
One of the most common questions from new operators is this: can I put my logo on the print? The answer is yes, and you can now set the whole thing up on the web before the unit ever ships, then have it arrive already configured. This guide covers how the branding areas work and how to finish the setup in advance.
How the branding areas work
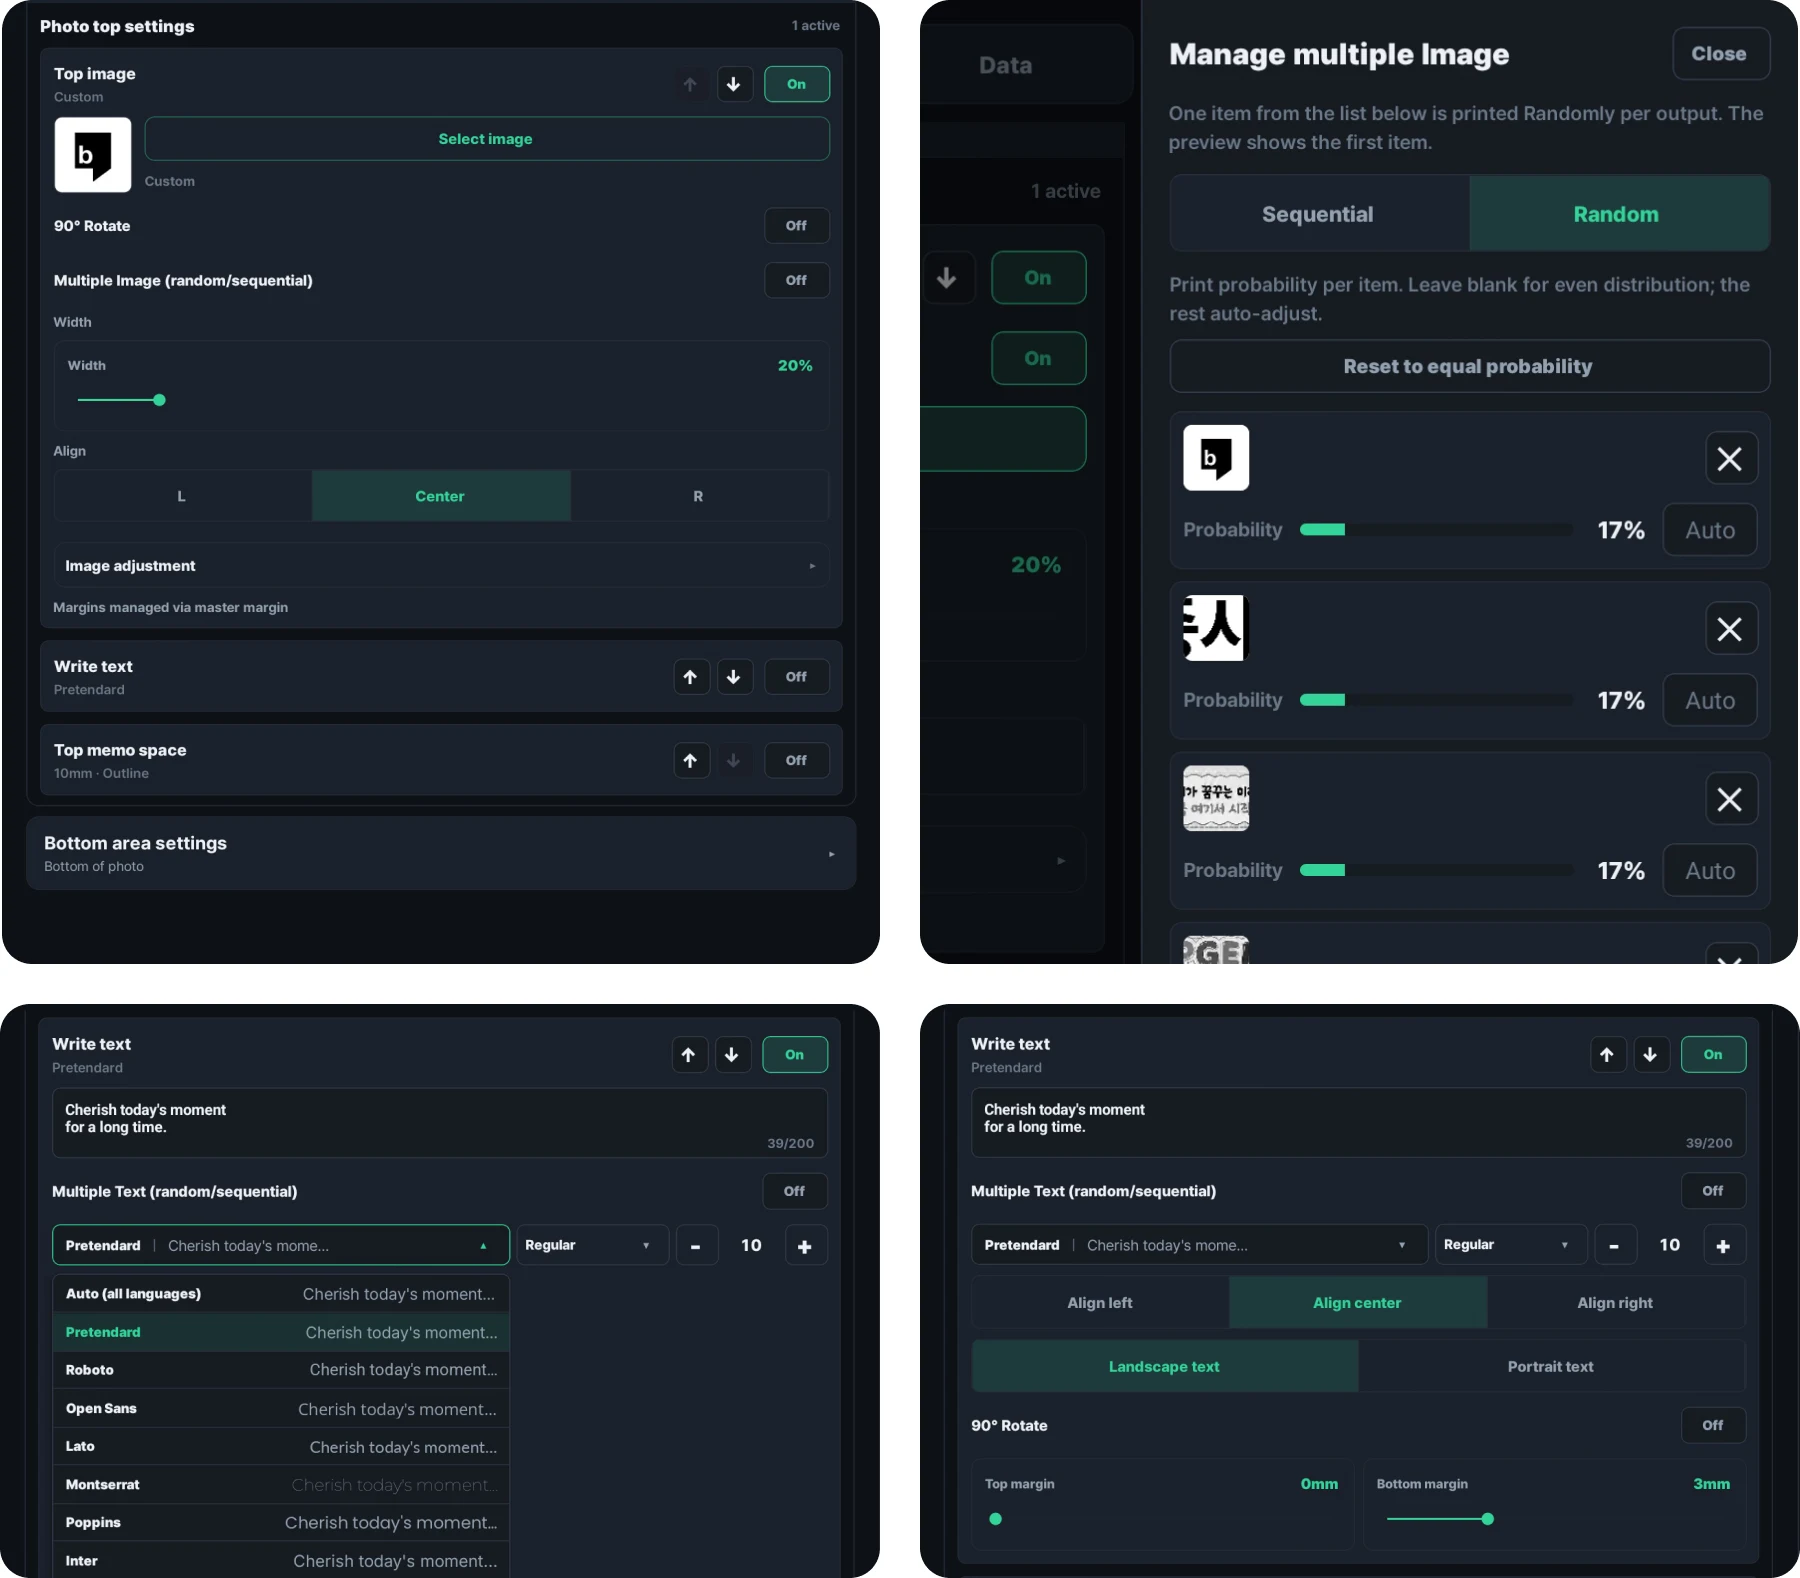
Every Receipt Camera® print has two branding areas: a top strip and a bottom strip. Each one can hold an image such as a logo, or text you type directly. Text is set in the app with a typeface and size of your choosing, so if all you need is wording, no graphics work is required at all.
Those two strips can carry:
- Your store logo or brand name
- A short slogan or welcome message
- A QR code linking to your Instagram, website, or a landing page
- An event name or promotional text
- A coupon code or seasonal greeting
The photo in the middle stays exactly as the camera captures it. The branding images sit above and below it.
Design tip: think in black and white from the start
Receipt Camera® prints thermally. The default is a single black tone, and the Brother label printer used on PRO+ can run either black-and-white or black-and-red two-colour label stock. Either way the rule is the same: bold, high-contrast graphics come out sharp, while fine details, soft gradients, and photographic elements tend to flatten or disappear.
What works well:
- A clean wordmark or logotype at a readable size
- Solid black text on white, or white text on a solid black field
- Simple line icons or bold symbols
- A QR code (QR patterns are inherently high-contrast and always print cleanly)
What to avoid:
- Drop shadows, gradients, or transparency effects
- Fine text smaller than roughly 16 px equivalent
- Complex illustrations with thin linework
- Photographs embedded in the branding strip
If your brand has a colorful logo, convert it to black and white and check whether it still reads clearly. A strong wordmark usually survives this; a photographic or gradient-heavy mark may need a simplified version made specifically for thermal output.
Set it up on the web before you buy
This used to mean downloading a Photoshop template and building the image yourself. Not any more. The web demo lets you configure everything in a browser and see the result immediately.
You can open it before you buy or rent, and build the exact configuration you will run on the real unit. Nothing to install, no account needed.
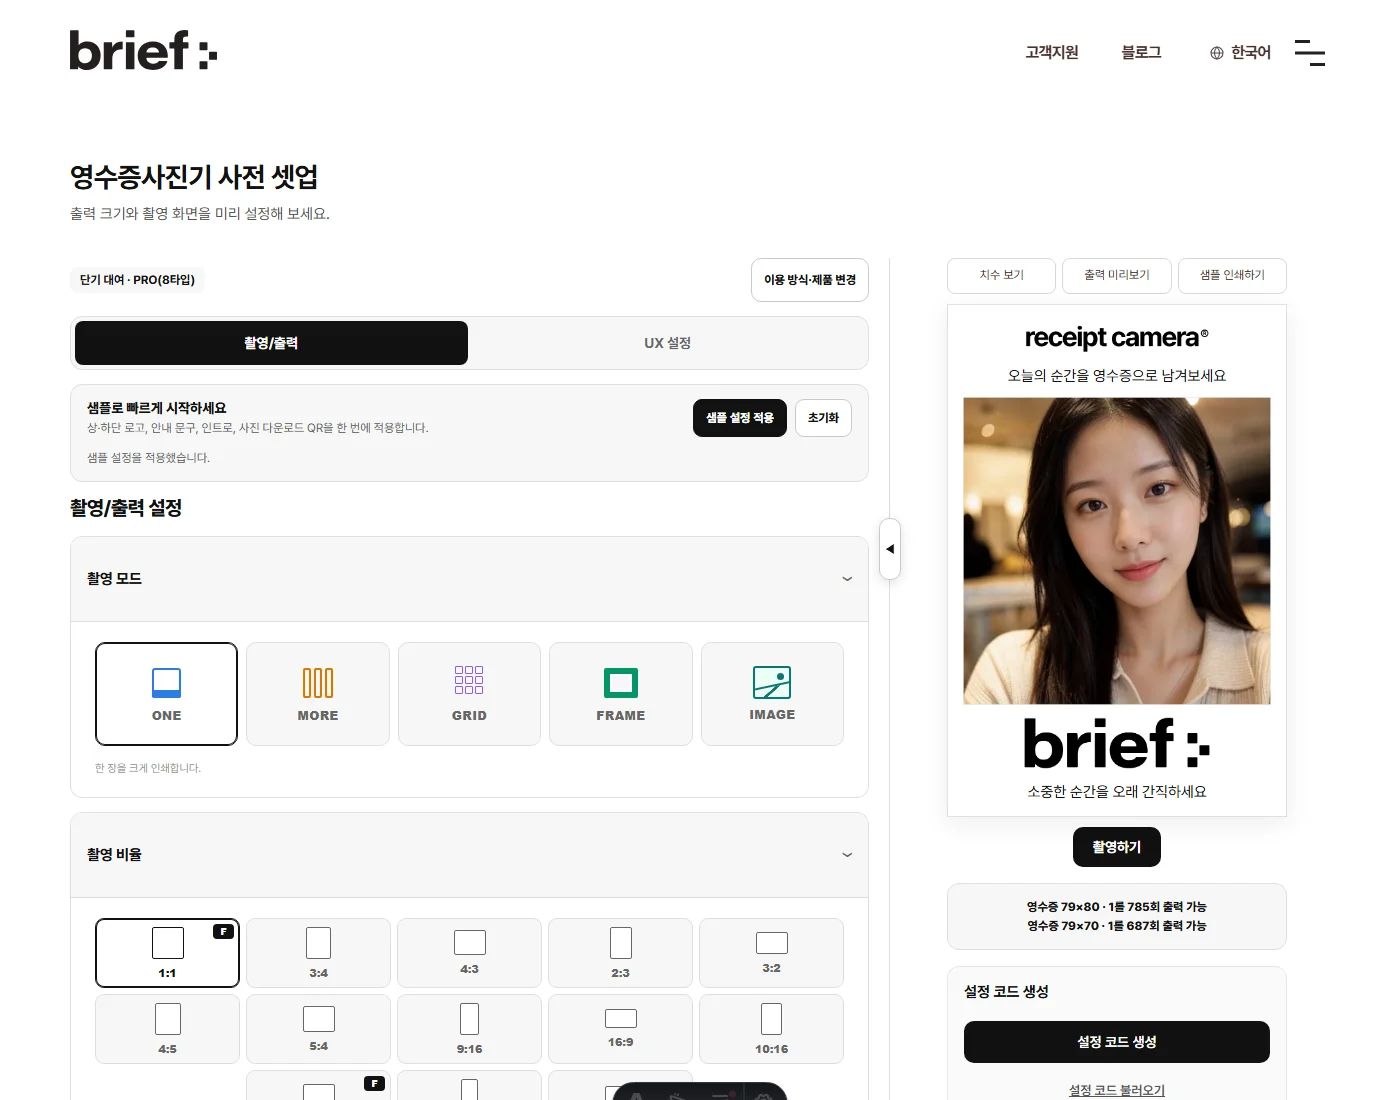
You start by picking a product: MINI, PRO, PRO+, or PRO+ Hybrid. The screen then adapts to that model’s features and paper size. PRO and MINI run 79mm receipt paper, PRO+ runs 62mm label stock, and PRO+ Hybrid handles both. Those constraints are applied for you, so you never spend time on a setting your unit cannot do.
Under the Capture & output tab:
- Capture mode (ONE, MORE, GRID, FRAME, IMAGE)
- Capture ratio
- Output basics (paper, wide mode)
- Branding (logo and text above and below the photo)
- QR code
The UX settings tab covers what the guest actually sees: the capture screen background, the shutter button, and the intro screen, with a library of ready-made backgrounds to choose from.
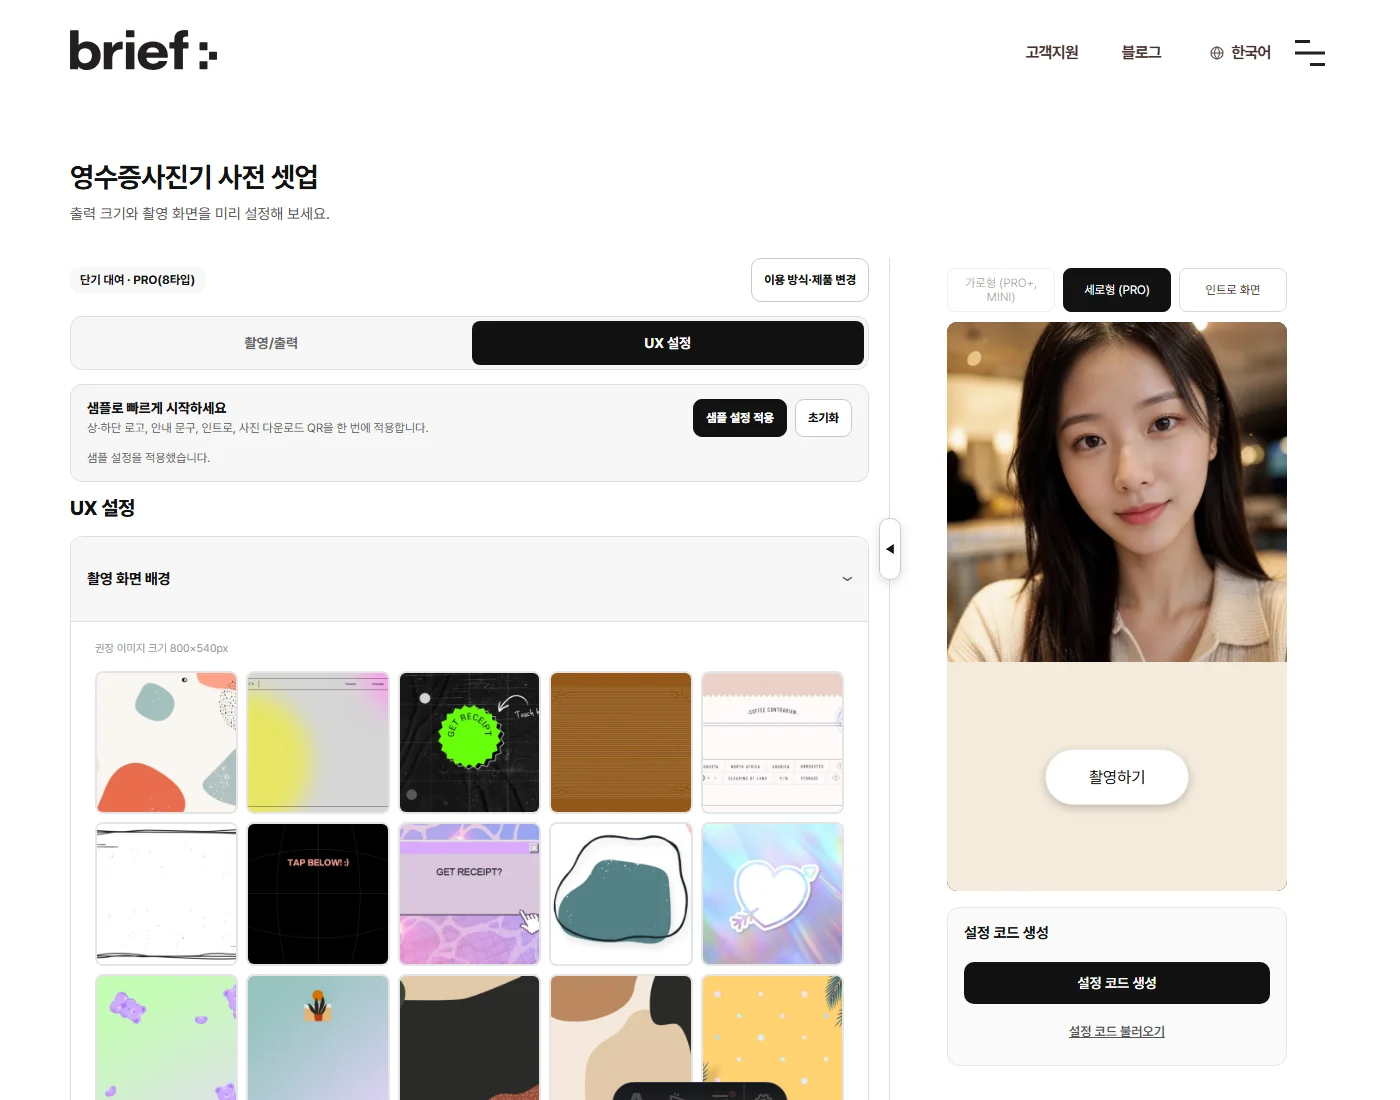
If you are not sure where to start, hit Apply sample settings. It fills in a top and bottom logo, a message, an intro screen, and a photo-download QR all at once, so you can see a finished example and edit from there.
See how it will actually print
The usual failure mode with branding is simple: it looked good on screen and came out muddy on paper. The web demo has two things that catch this early.
First, the output preview. It applies the same dithering the thermal printer uses, showing your design converted into the black-and-white dot pattern that actually gets printed. Toggle between that and the original view and you can see immediately whether your logo survives thermal output.
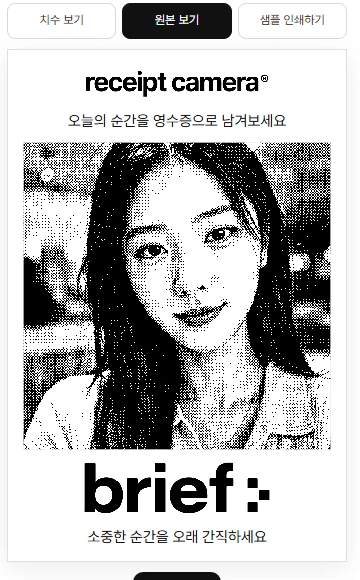
Second, print a sample. An ordinary home or office printer is enough. The strip prints onto A4 at true receipt width, so you can hold the real thing and judge text size and contrast for yourself. You do not need a thermal printer to know how it will feel in a guest’s hand.
There is also a dimensions view for the exact millimetre spec, and a running count of how many prints you get per roll on the paper you selected.
Ship it already configured
Once you are happy with the setup, press Generate setup code. Everything you configured is saved into a single code.
- Send that code along with your purchase inquiry and we will ship the unit with those settings already applied, ready to run the moment it arrives.
- If you have already purchased, you can send the code straight to your contact instead.
- The code stays valid for 31 days, and Load setup code picks the work back up at any point, including from a different device or browser.
You can always configure everything by hand in the app later, but handing over a code before shipping means there is nothing left to do on installation day.
Already running a unit? Back up and share settings in the app
If you already operate a unit, you can pass settings around as codes inside the app too, through Settings backup and sharing on the app’s Data tab.
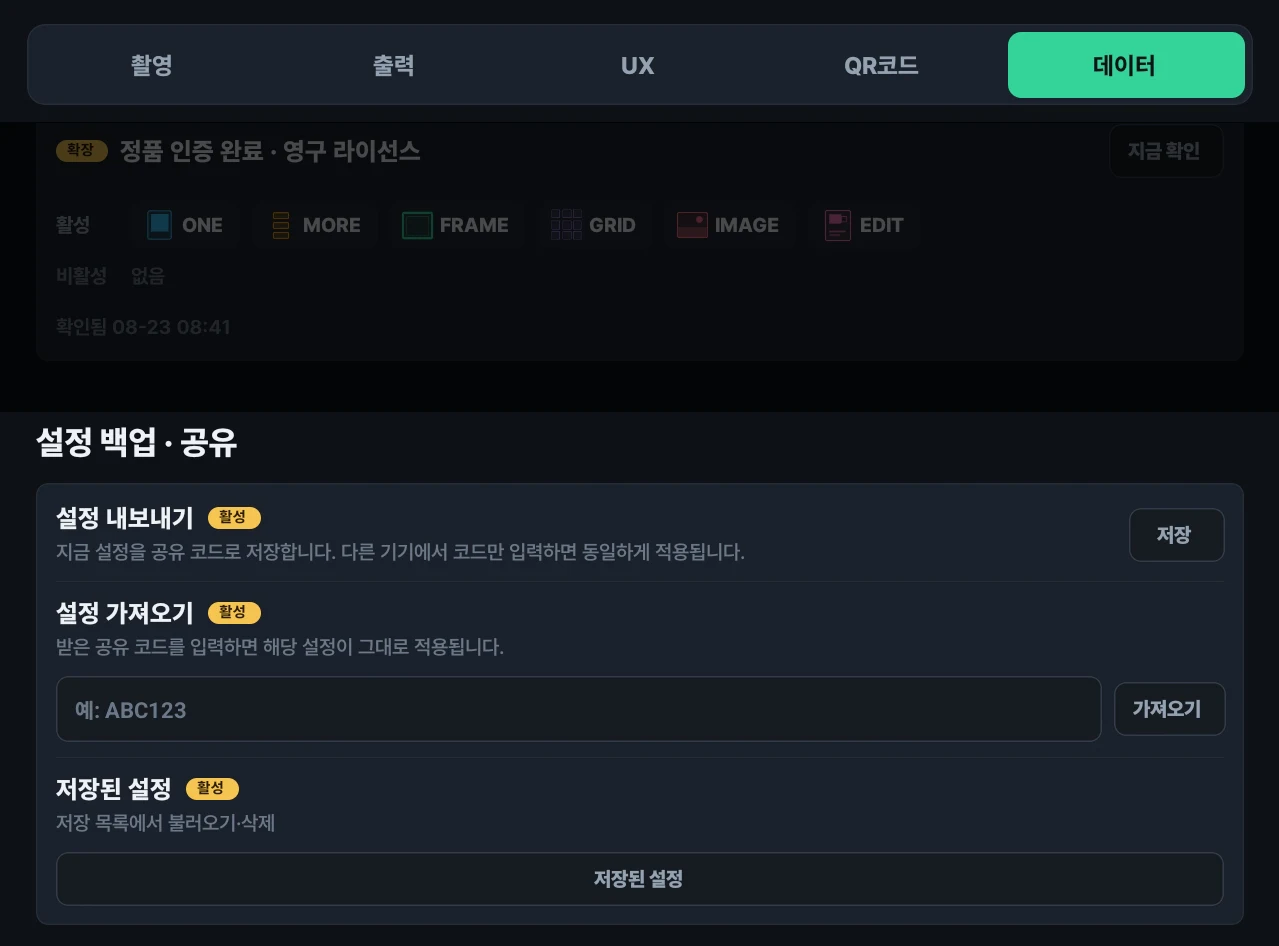
- Export settings: saves your current configuration as a short share code (for example ABC123).
- Import settings: enter a code you received and those settings are applied as-is.
- Saved settings: load or delete from your stored list.
This is most useful when you run several units, or when you open another location and want an identical setup. Branding you dialled in on one unit moves to the rest with a single code.
This one requires the Extended subscription, which the hardware purchase does not include. Buying a unit comes with a licence: PRO and PRO+ share the PRO licence, while MINI has its own MINI licence. That covers the capture modes and everyday operation. Settings backup and sharing sits one tier above, on the Extended plan, billed monthly and separate from the hardware.
So if your plan is to buy several units and run them all on one identical configuration, budget for Extended from the start. On the bundled licence alone, each unit has to be configured by hand. The feature also needs an internet connection to exchange codes.
Importing replaces the existing settings on that unit, and licences, subscriptions, credits, and passwords are never carried over. Only the configuration itself is copied.
Branding checklist before going live
- Open the web demo and pick your usage type and product
- Build the top area (logo image or text)
- Build the bottom area (logo image or text)
- QR code added if you want guests to reach a URL
- Capture background and intro screen checked under UX settings
- Output preview checked for dithering (does the logo hold up?)
- Sample printed at real size for a final look
- Setup code generated and sent with your inquiry
Get it right from day one
A clearly branded print is a small but visible detail that signals to guests that the experience is considered. It also makes every photo a piece of marketing guests carry out the door.
For more ideas on how operators are using the Receipt Camera® in real venues, see the use cases page.
If you are interested in bringing the Receipt Camera® to an overseas venue, or want to discuss a distribution or partnership arrangement, use the inquiry form below. Tell us your region and intended use, and we will follow up with the right information.